Some users have reported seeing an error message in their computer’s Notification Panel that has the heading “Failed to connect to a Windows service” and states, “Windows could not connect to the Group Policy Client service. This problem prevents standard users from logging on to the system. As an administrative user, you can review the System Event log for details about why the service didn’t respond.”
The possible causes of the “Failed to connect to a Windows service” error message
This error arises when a computer crashes after the rebooting process during Windows Updates. The computer restarts after the crash and reports an unexpected shutdown during Windows Updates. Right after this, it starts displaying this error message. In most cases, this error message is given birth to by the loss of important Registry settings required to initialize the Group Policy Client service.
How to get rid of the “Failed to connect to a Windows service” error message
The following are the most effective solutions that you can use to try and fix this issue:
Solution 1: Fix this problem using the Registry Editor
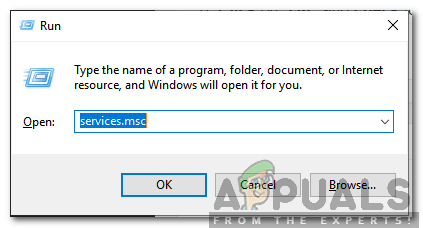
Press the Windows Logo key + R to open a Run dialog, type regedit into the Run dialog and click on OK. Doing so will launch the Registry Editor.
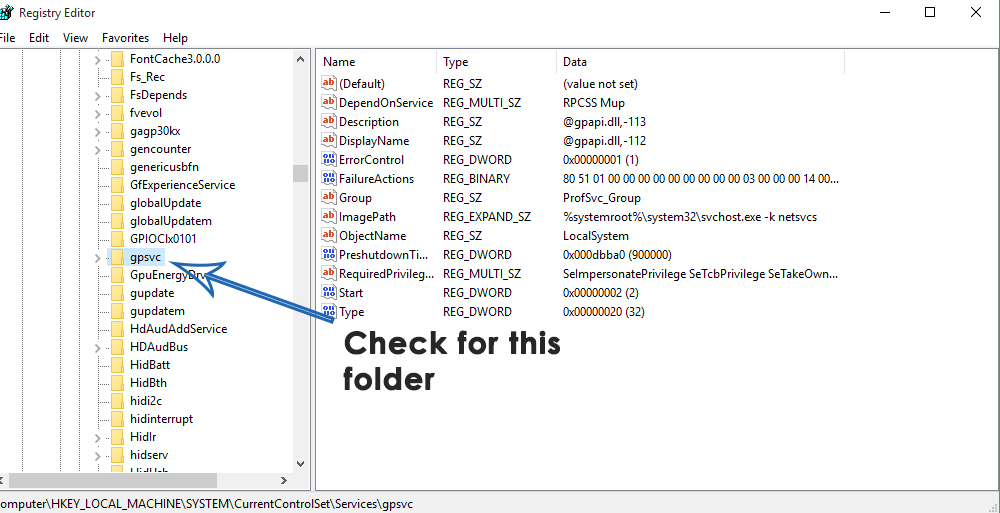
In the left pane of the Registry Editor, navigate to the directory described below and check to see whether or not a folder named gpsvc is present. This folder is responsible for service configuration and parameters. In almost all cases, it will be present.HKEY_LOCAL_MACHINE > SYSTEM > CurrentControlSet > Services
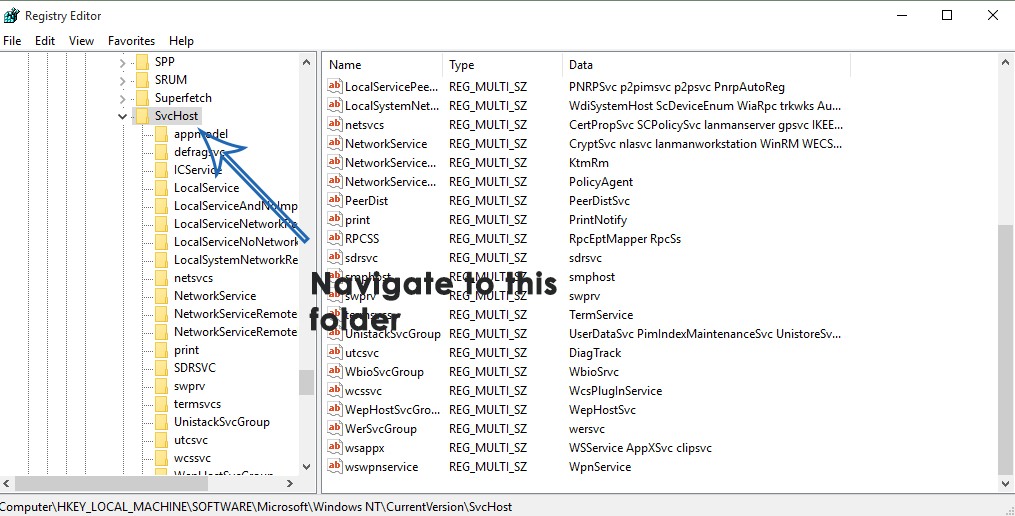
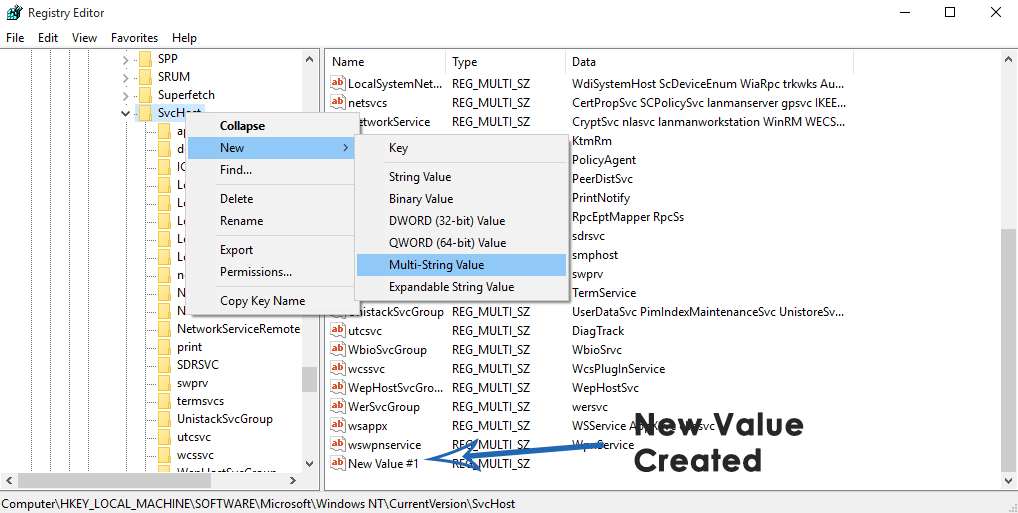
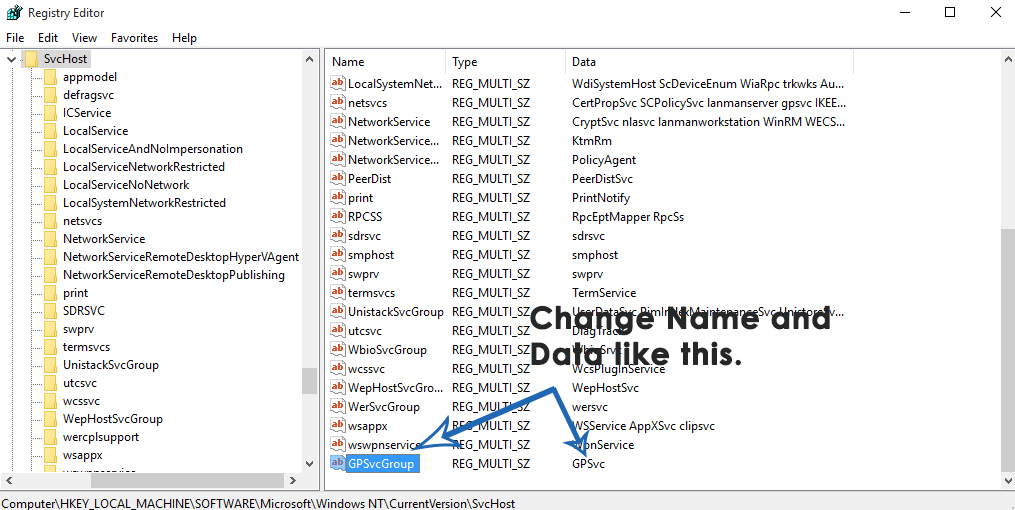
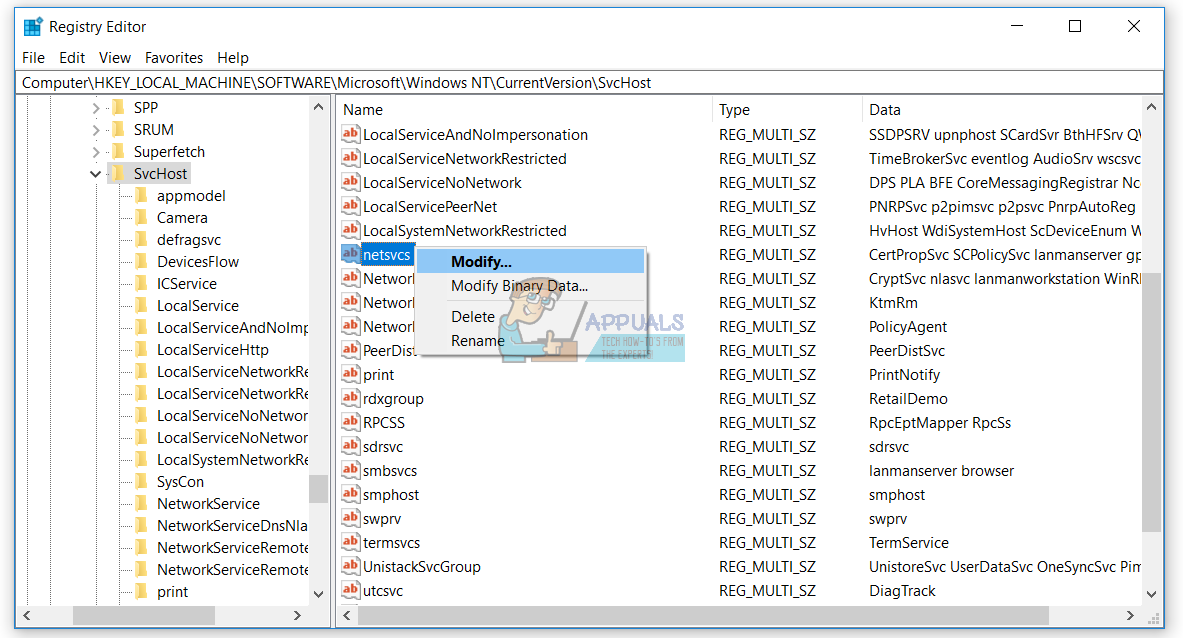
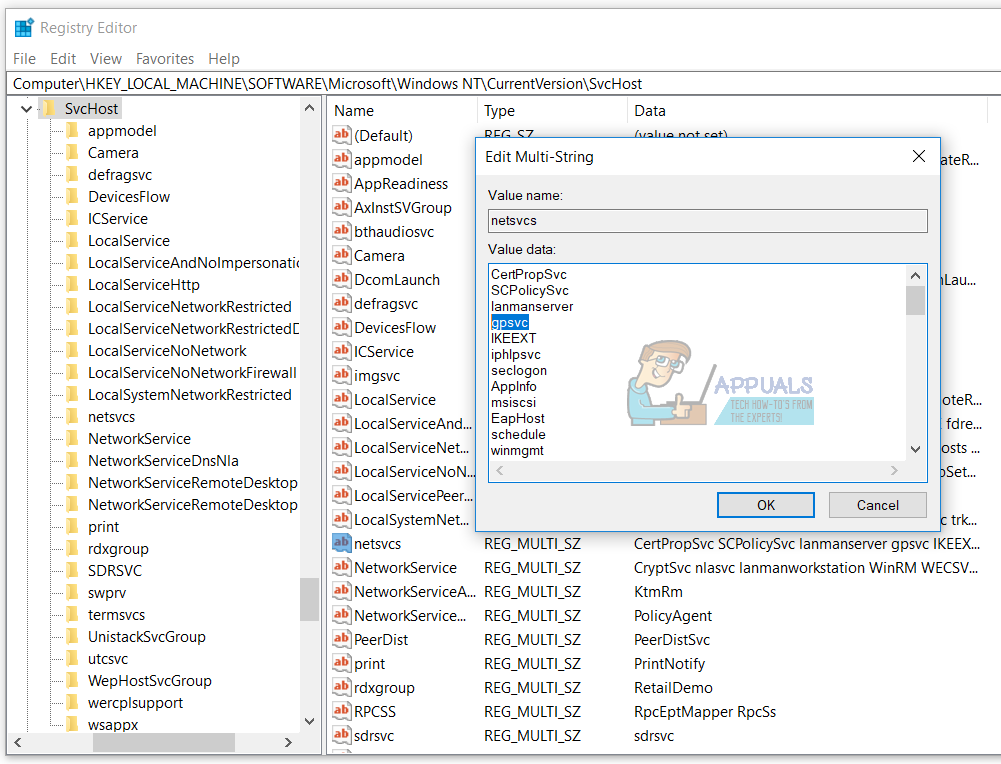
If gpsvc is present, then navigate to the directory described below in the left pane of the Registry Editor. This is an extremely important and fragile directory so make sure that you don’t touch anything else. Inside the SvcHost folder, there must be some keys and values which are required for the process to be completed. Check for a multi-string value GPSvsGroup inside SvcHost. If it is not present, you are going to have to create it yourself. In order to create the multi-string value, right-click on the SvcHost folder, hover over New and click on Multi-String Value. Doing so will create a new registry value in the right pane. Rename the new multi-string value GPSvcGroup by right-clicking it, clicking on Rename, typing in GPSvcGroup and pressing Enter. Now, double click on the GPSvcGroup value to modify it, replace whatever is in the Value data field with GPSvc and click on OK.
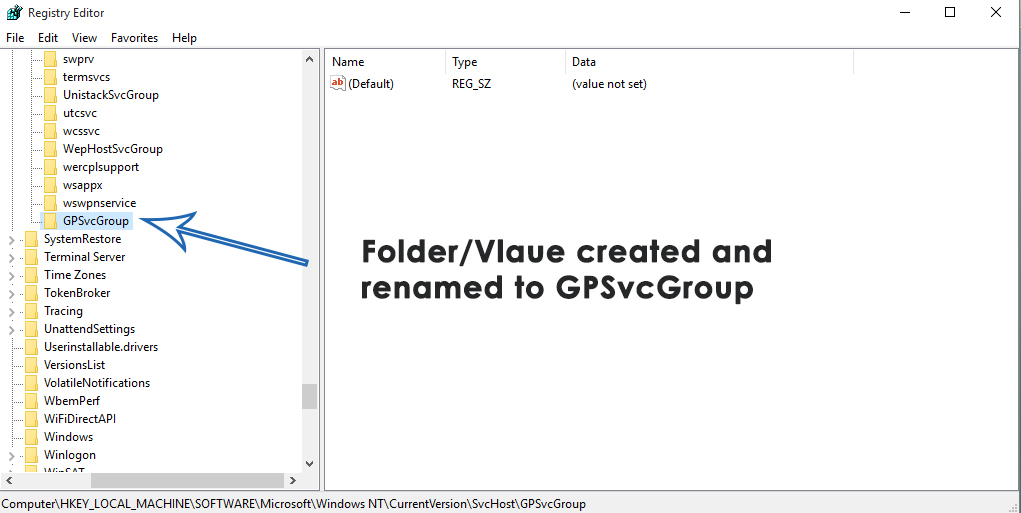
The next thing you might need to do is to create a new folder (key) inside SvcHost. To do so, right-click on SvcHost in the left pane, hover over New and click on Key. Rename the new registry key GPSvcGroup.
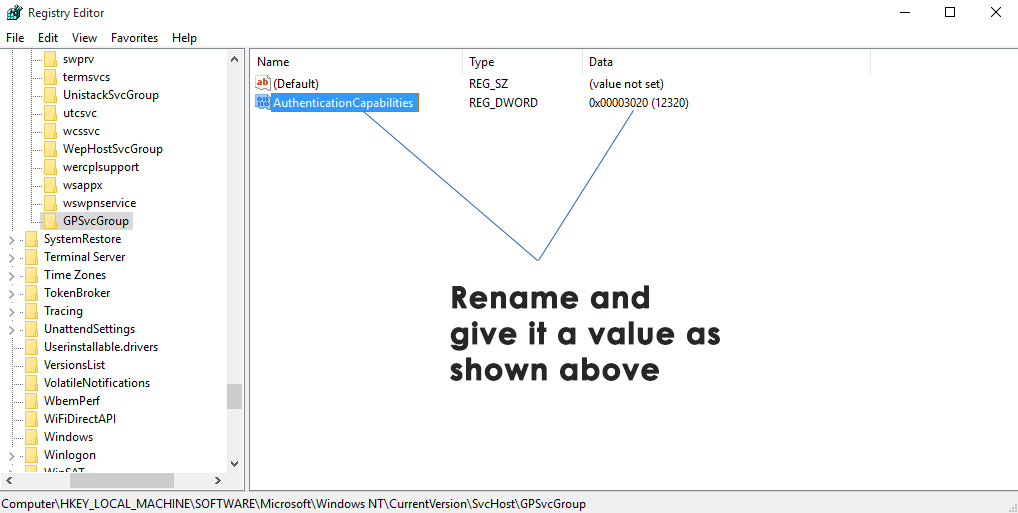
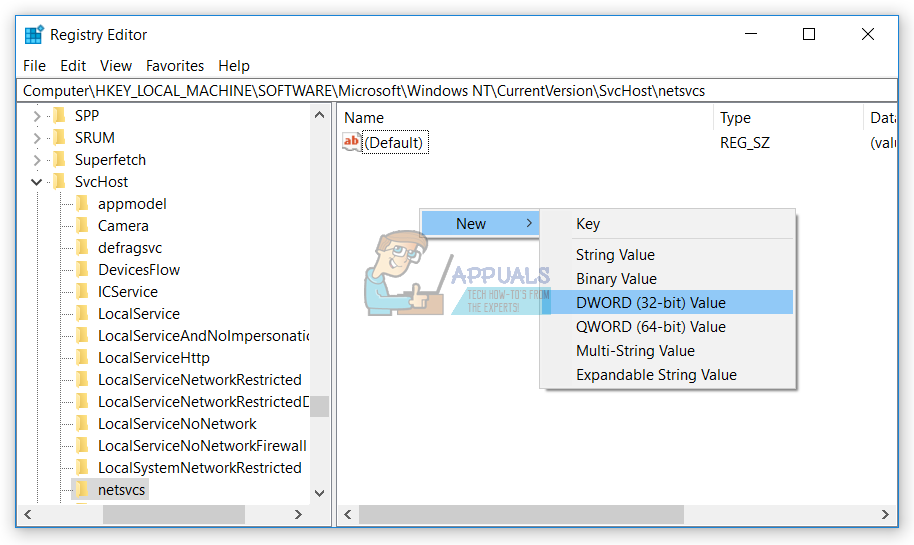
Click on the GPSvcGroup key in the left pane to have its contents displayed in the right pane. You now need to create 2 new DWORD (32-bit) values in the right pane of GPSvcGroup To do so, right-click on an empty space in the right pane, hover over New and click on DWORD (32-bit) Value. This process needs to be repeated 2 times to create a total of 2 new DWORD (32-bit) values. The first value needs to be renamed AuthenticationCapabilities and should have 12320 as its Value data and Decimal as its base.
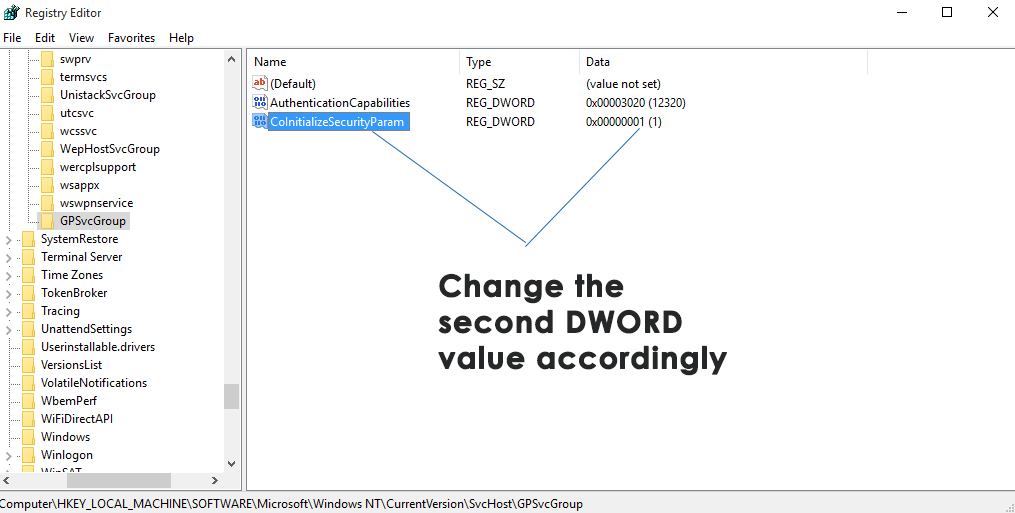
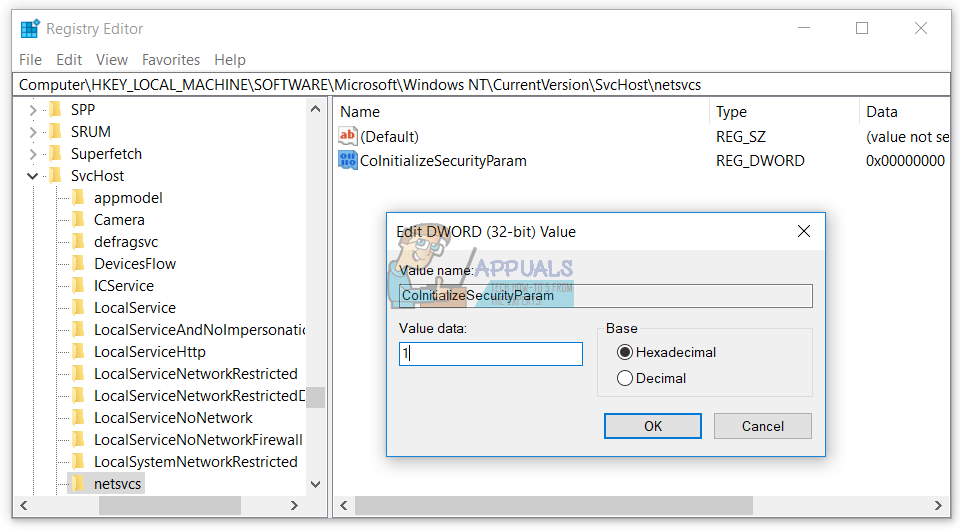
The second value needs to be renamed CoInitializeSecurityParam and should have 1 as its Value data and Decimal as its base.
Close the Registry Editor. Restart the computer and check to see whether or not the problem still persists once it boots up.
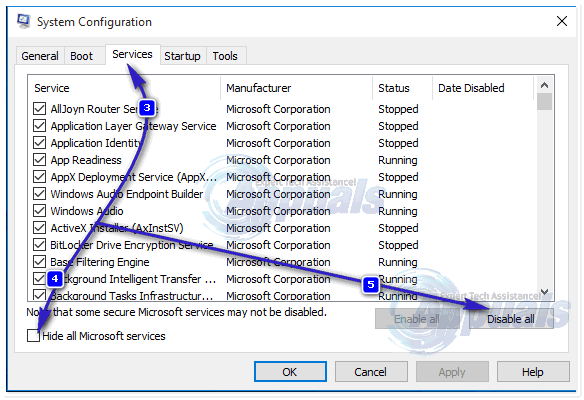
Solution 2: Try clean booting the affected computer
Solution 3: Reset the affected computer’s Winsock catalog
For some reason, many users affected by this issue have been able to get rid of it by simply resetting their computers’ Winsock catalogs. In order to reset a Windows computer’s Winsock catalog, you need to:
Solution 4: Allow Full Control of all relevant registry keys to Administrators using the Registry Editor
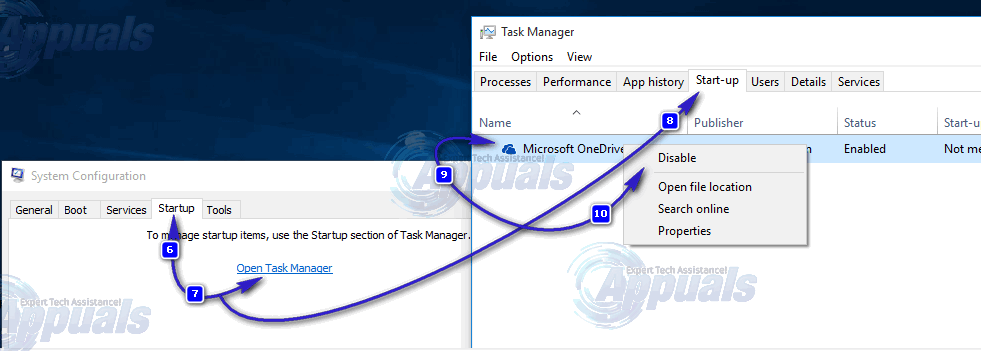
Solution 5: Turn Fast Startup off (for affected Windows 10 computers only)
Many users affected by this problem who have computers running on Windows 10 have had success with fixing this issue by turning off Fast Startup, a feature designed to allow Windows 10 computers to boot up faster but a feature that, in many cases, ends up becoming more of a nuisance than a blessing. In such cases, disabling Fast Startup has been able to fix this issue. The following are the two ways you can go about disabling Fast Startup:
Method 1
Method 2
The second method that can be used to disable Fast Startup is to simply disable the Hibernate feature, deleting the hiberfile and disabling Fast Startup as a result. You should use this method if Method 1 doesn’t work or if you simply want to disable Fast Startup and gain a bit of disk space (the hiberfile takes up as much disk space as the amount of RAM your computer has) at the same time, although it should be noted that using this method will also result in the loss of the Hibernate feature. Once you have used your preferred method to disable Fast Startup, you should no longer be seeing the “Failed to connect to a Windows service” error message on your Windows 10 computer.
Solution 6: Manually create registry keys and registry values
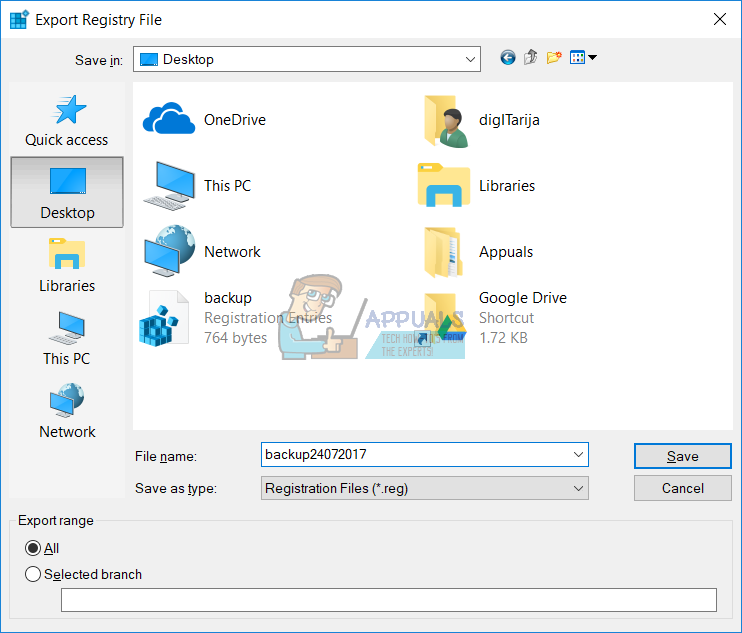
Before you do any registry configuration, we are recommending you to backup registry database. Why you need to do registry backup? In case of some misconfiguration, you can revert registry database to previous state when everything worked without new problems.
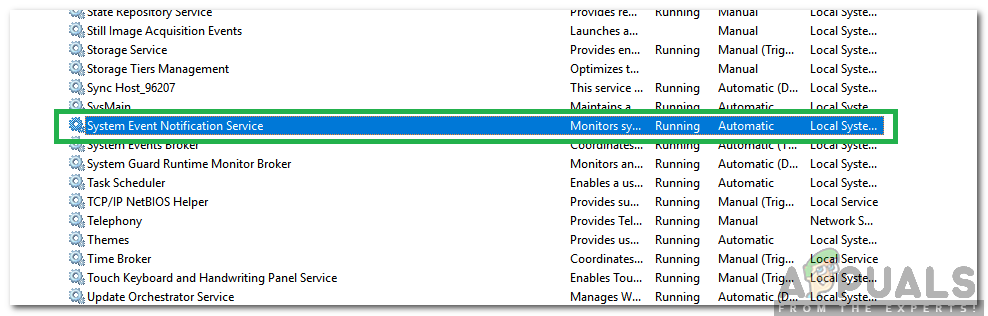
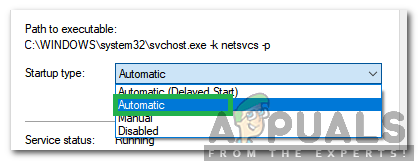
Solution 7: Starting System Event Notification Service
It is possible that the System Event Notification Service has been disabled which can result in triggering this error. Therefore, in this step, we will be enabling and starting the System Event Notification Service. For that:
Fix: Failed to Connect to the Rockstar Games Library ServiceFix: Windows Could Not Connect to the System Event Notification ServiceFix: We Couldn’t Connect to the Update Service on Windows 10How to Fix ‘Can’t Connect to Your Service’ Zoom Error Code 104101 on Windows 10?